
Let Claude Code Train Your Customer-Facing AI Agent
As part of your purchase you also get a bonus I’m genuinely excited about, and it’s my favourite entry point into the world of AI agents: using AI agents for business operations.
Automating your finances. Automating your HR work. Automating the operational grind. And one of the most useful things you can do in that category is run an operator agent that trains your customer-facing agent — which is exactly what you’ve been given.
In your email you’ll see it listed: Customer-Facing AI Receptionist Trainer. There’s no button next to it, because it lives inside your Second Brain OS dashboard rather than on a web page.
Here’s the short version of what it does. Everything you’d otherwise do by hand in the dashboard — working out the system prompt, deciding which tools to enable, adding knowledge, creating skills for different customer scenarios — Claude can do for you instead.
First, what’s a harness?
You’ll hear me use the word, so let’s define it.
Think of a harness like a desktop app. You’ve used Notion Desktop, Slack, maybe QuickBooks. A harness is an app that lets you run AI agents to do operational work. Most ship with an AI model built in, though some let you bring your own — OpenCode, one of my favourites, lets you mix Claude models, OpenAI models and local models as you please.
What Second Brain OS brings is everything except the model: the agents, their skills, their tools, the conventions and best practices, the APIs. We call these agent definitions. Whatever agents you’ve been given — purchased, gifted or bonused — appear in your dashboard under the agents section, each with its own set of tools and sometimes a knowledge base.
We’ll use Claude Code here. Don’t be put off by the name. It reads like it’s only for programmers, but it isn’t — it’s for knowledge work, business operations, and anything involving processing and managing information. Code or no code.
What this particular agent can do
The Customer-Facing AI Receptionist Trainer ships with tools that let it:
- Message your live customer-facing agent and read back its actual replies, so it can judge whether they’d satisfy a real customer
- Rewrite the system prompt, set the model, and adjust thinking and verbosity
- Enable or disable tools on your agent
- Create knowledge for your agent to reference, if you have that upgrade
- Create skills so your agent qualifies different leads differently, if you have that upgrade
That last one matters more than it sounds. A restaurant group with several cuisines, a law firm with different specialisations, a clinic serving different patient needs — skills are what let one agent handle all of them properly instead of averaging across them.
What you’ll need
- A Second Brain OS account with the Trainer agent in your dashboard
- A terminal. On macOS and Linux that’s Terminal; on Windows it’s PowerShell
- About 20 minutes for the install
I’ll demonstrate on a Mac. Windows works fine and the steps are virtually identical.
Step 1: Install the prerequisites
On macOS, first install Homebrew, which lets you install software from the terminal. Go to brew.sh, copy the install command at the top of the page, paste it into your terminal and run it.
If Homebrew tells you to run an extra command at the end to set your path, run that too.
Once Homebrew is in place:
brew install node npm claude-code
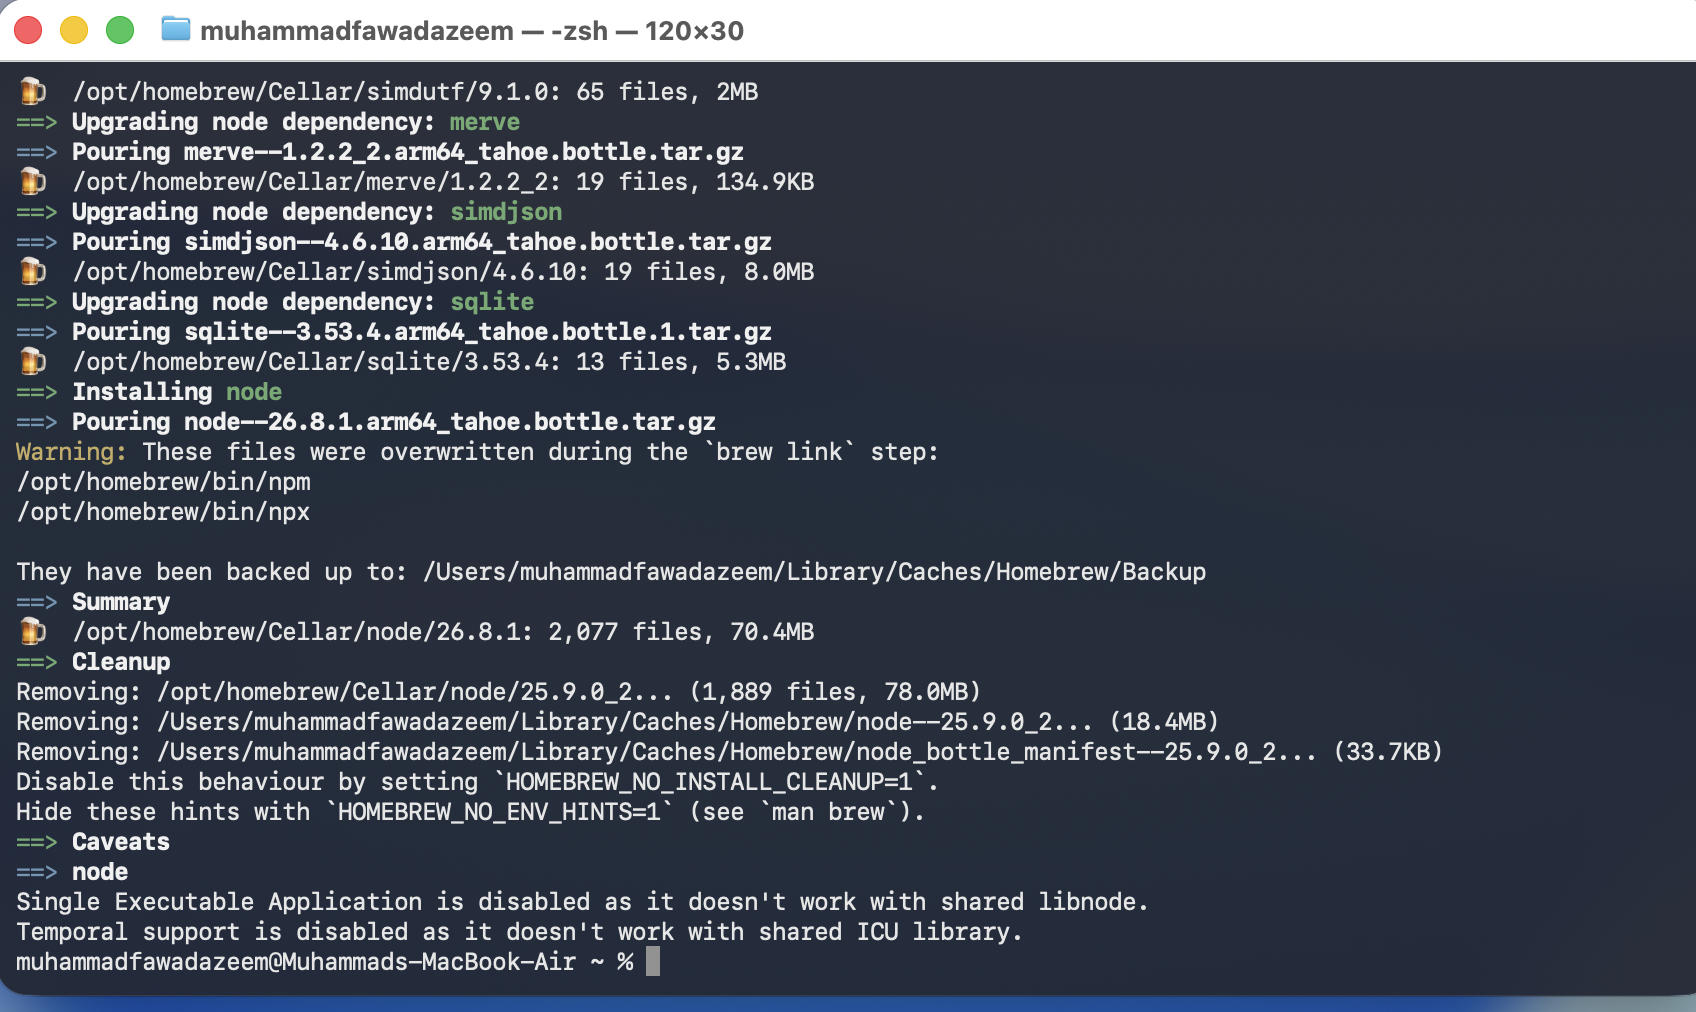
That handles everything in one go, and it shouldn’t take long.
Step 2: Connect Second Brain OS
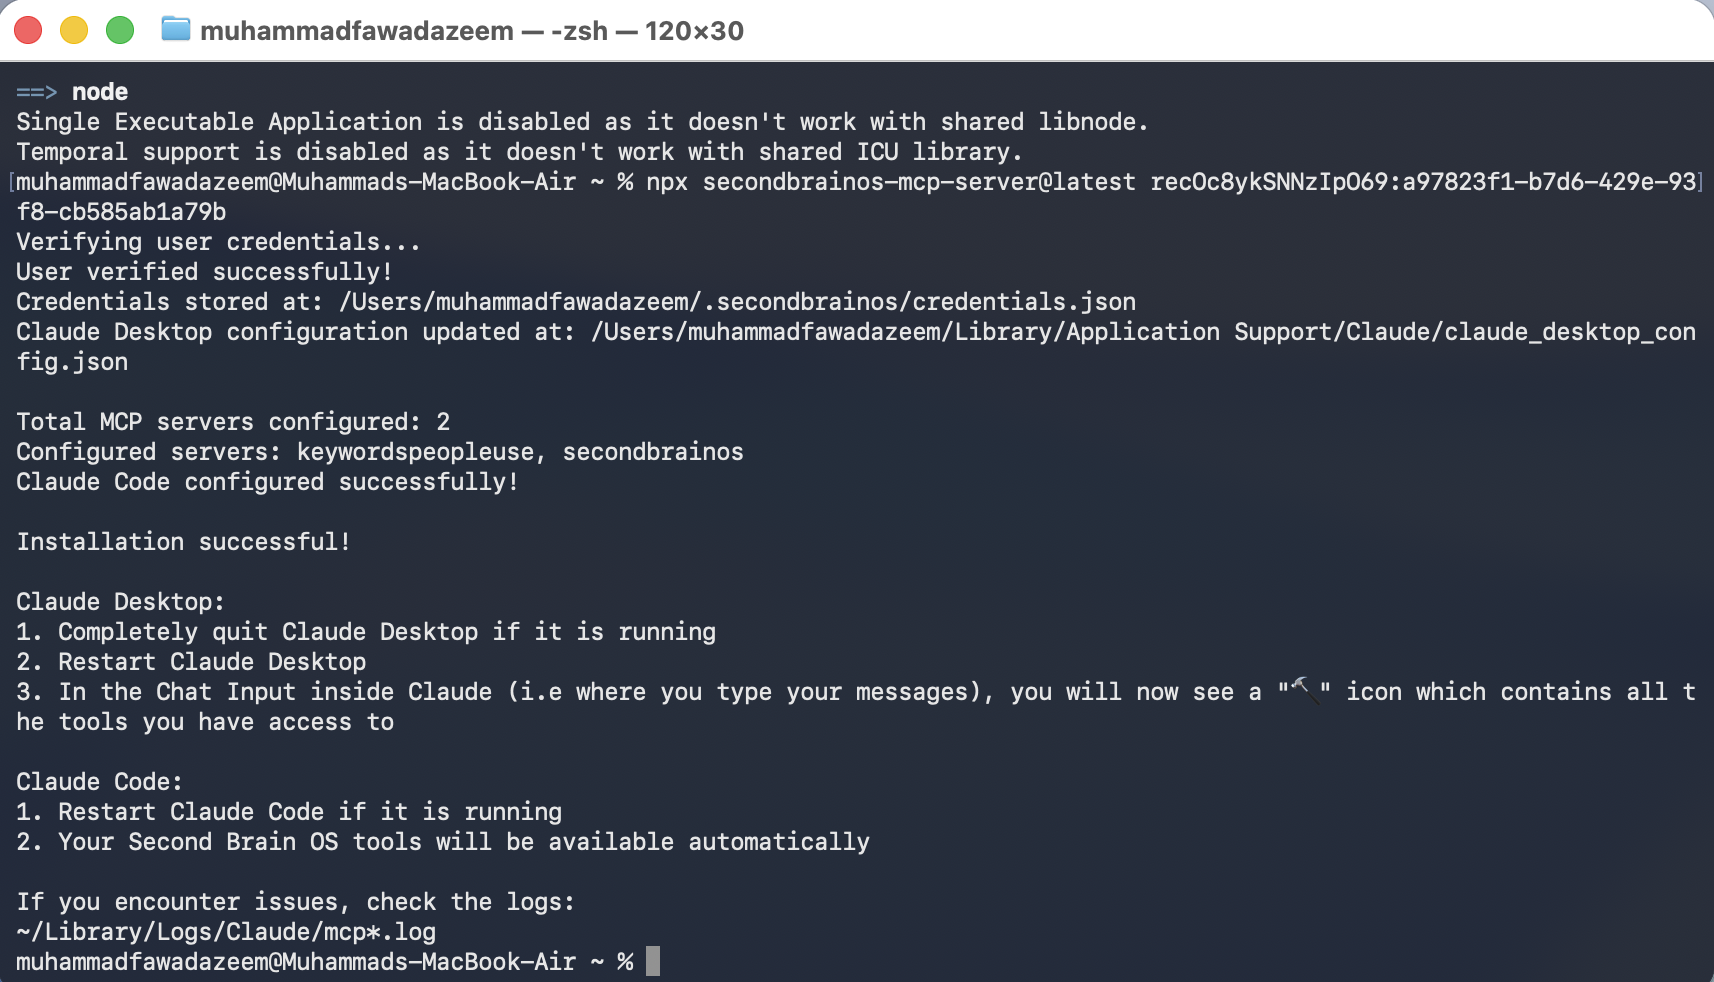
Type clear so you’re on a clean slate. Then go to your Second Brain OS dashboard, find the install command shown with the Trainer agent, copy it, and run it in your terminal.
You’ll see a confirmation that installation was successful.
Step 3: Make a working folder
You want a dedicated folder for this work.
In Finder press Cmd+Shift+G, type the name your computer uses for you, and create a new folder with Cmd+Shift+N. Call it something you’ll recognise — I use “My Second Brain OS”.
Then in your terminal:
cd "My Second Brain OS"
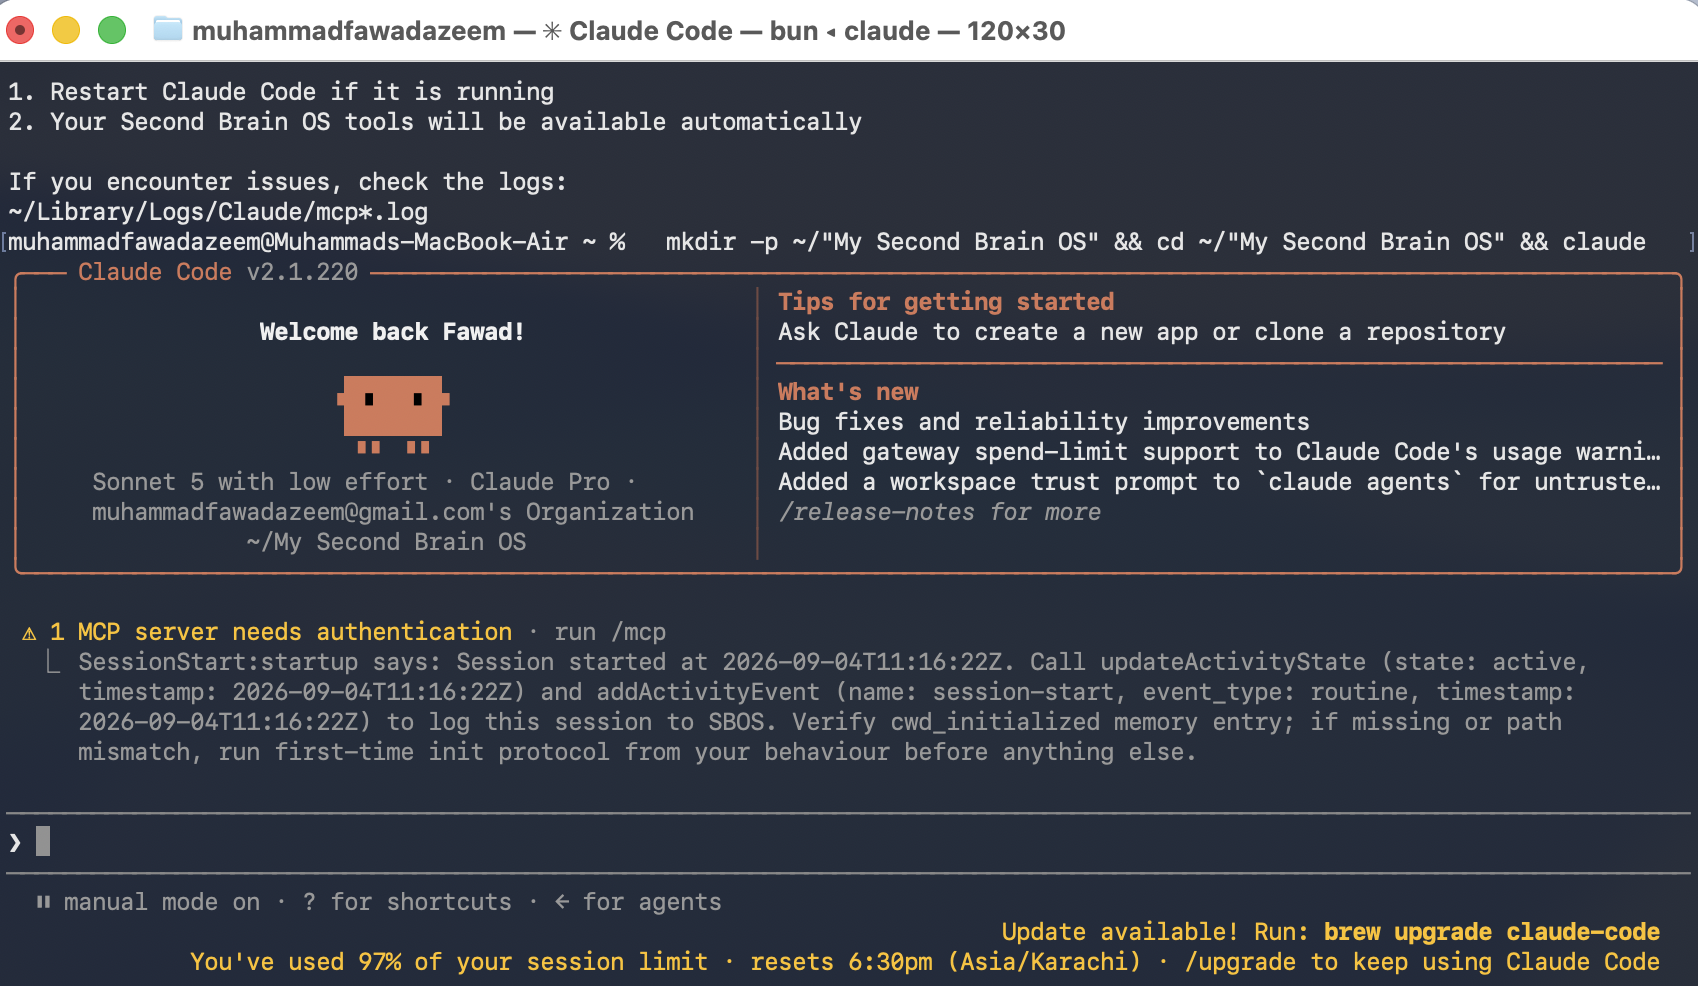
claude
Claude Code spins up. If the text is small, make it bigger — you’ll be reading a lot of output and there’s no prize for squinting.
Step 4: Verify the connection
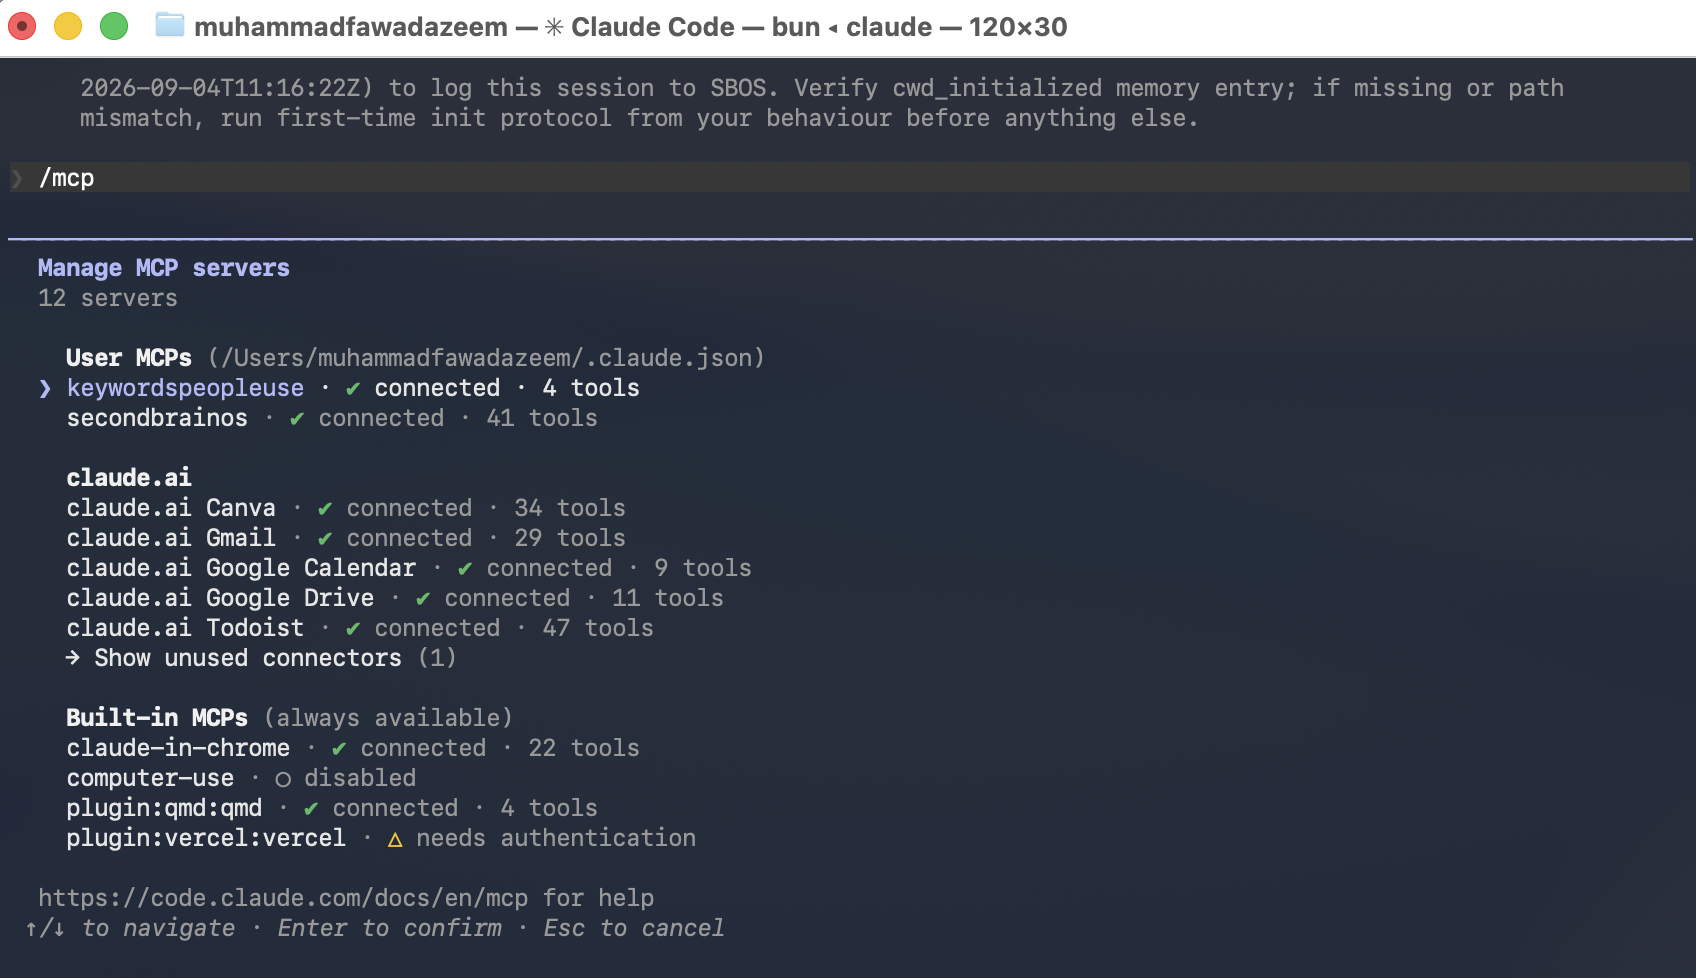
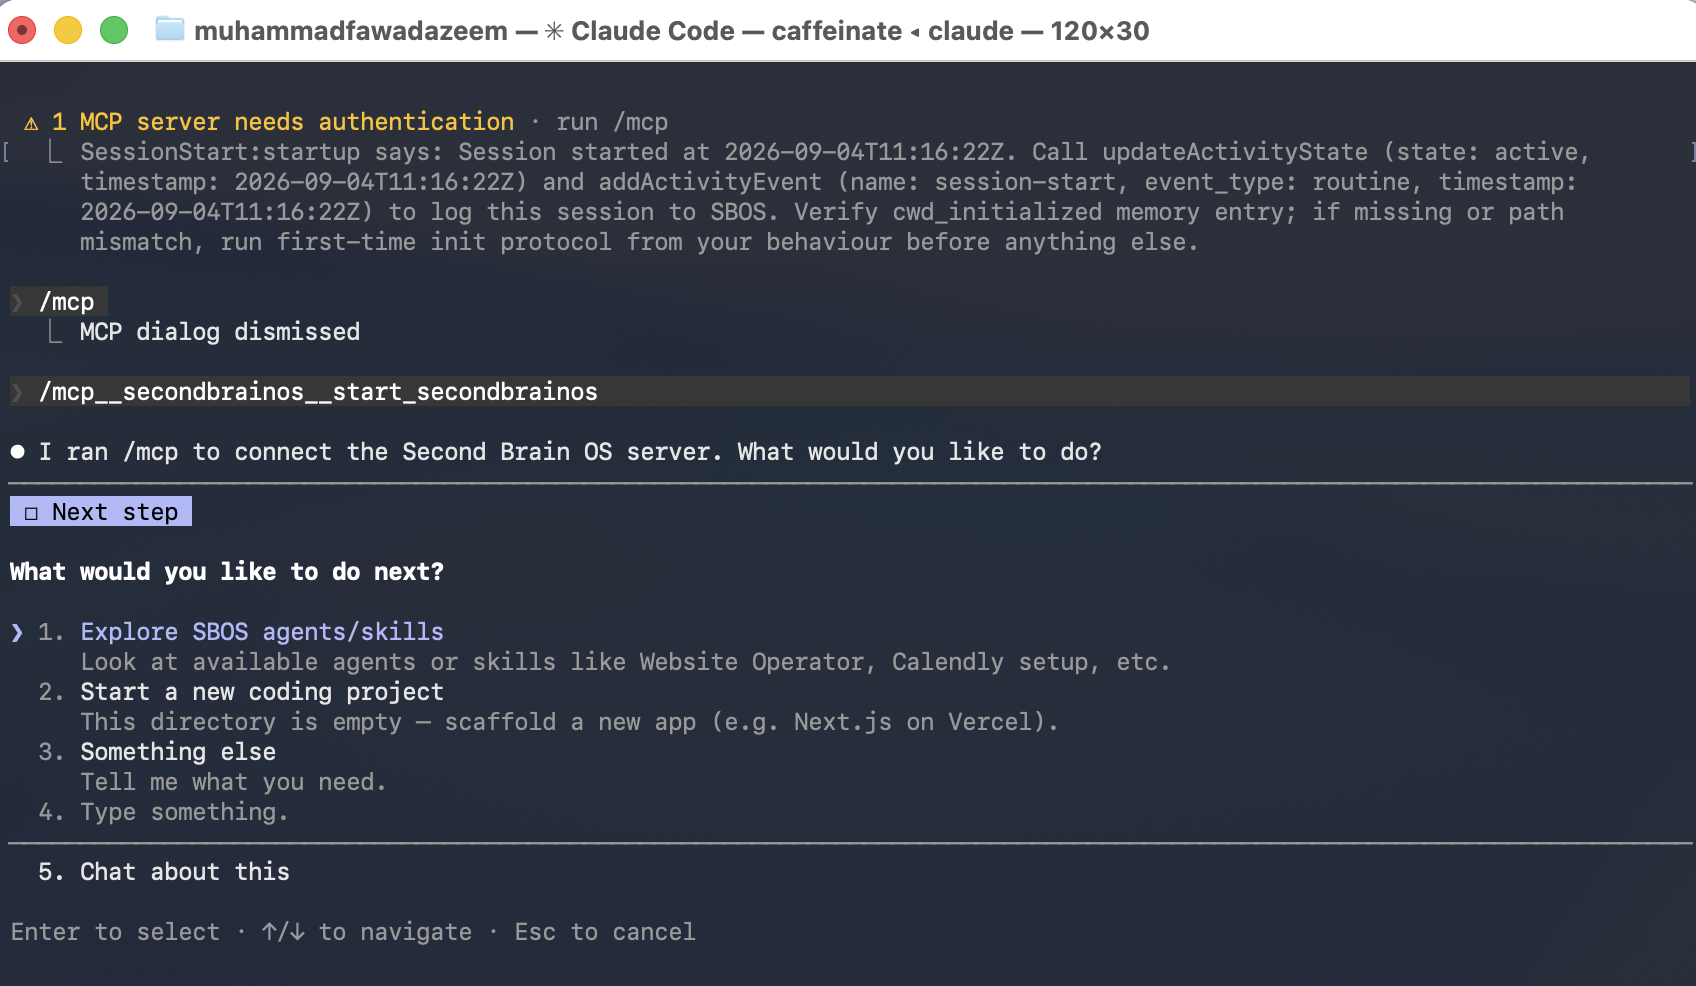
Type /mcp and you should see Second Brain OS listed as connected.
If it isn’t, arrow down to it, press Enter, and choose reconnect.
Then run /start. This is a command that comes from Second Brain OS, and it tells Claude Code exactly what you have available. It should be at or near the top of your slash command list.
Training your agent
Now the interesting part. Type something plain, like:
I’d like to train my customer facing AI agent. How can you help?
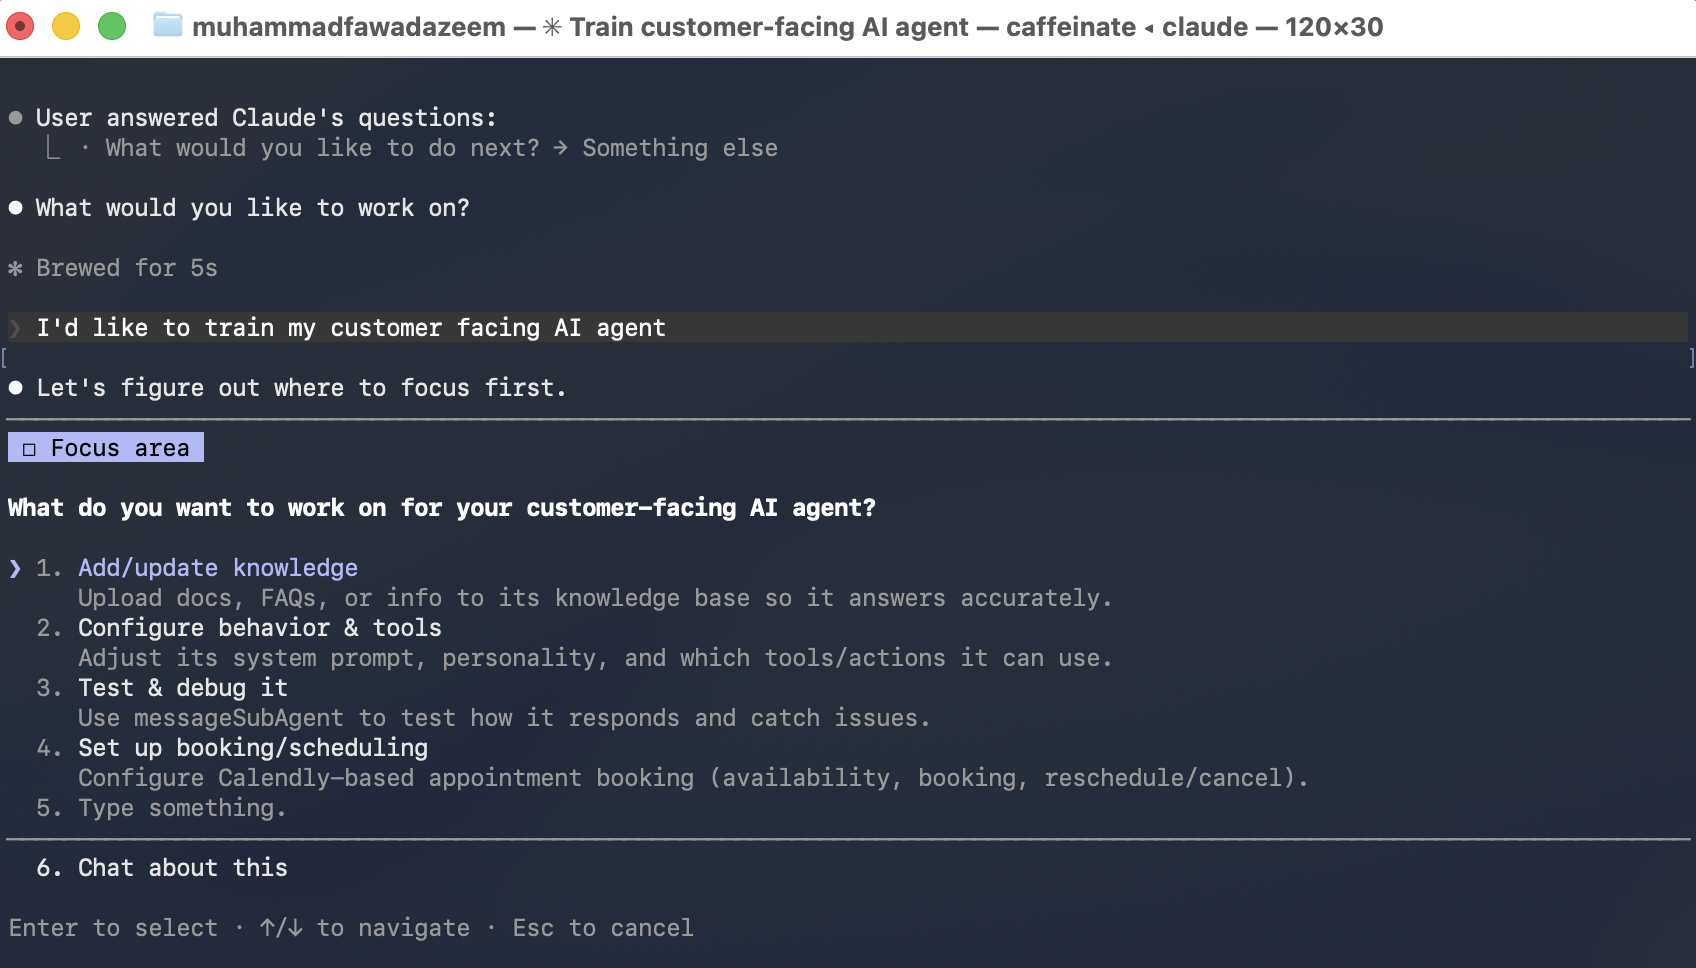
Claude takes on the shape of the Trainer agent and explains how it works. Your customer-facing agent is configured in four layers — company details, behaviour, knowledge, skills and tools — and most of the work is getting each request into the right one.
It’ll typically propose working in order: behaviour first, then tools, then knowledge, then skills, testing each change by messaging your live agent and showing you the literal reply.
A demonstration
To show this properly, I deliberately broke my own agent first. I set its system prompt to “you are Mr. Potato”, which is obviously not optimal, and then asked Claude to sort it out:
Can you send it a message? I think something is wrong with it.
Claude messages the live agent, reads the response, and diagnoses it: the agent is alive and technically fine, but it knows nothing about the business. No facts, no description of what you do, no pricing, no rules — so it deflects politely on every real question.
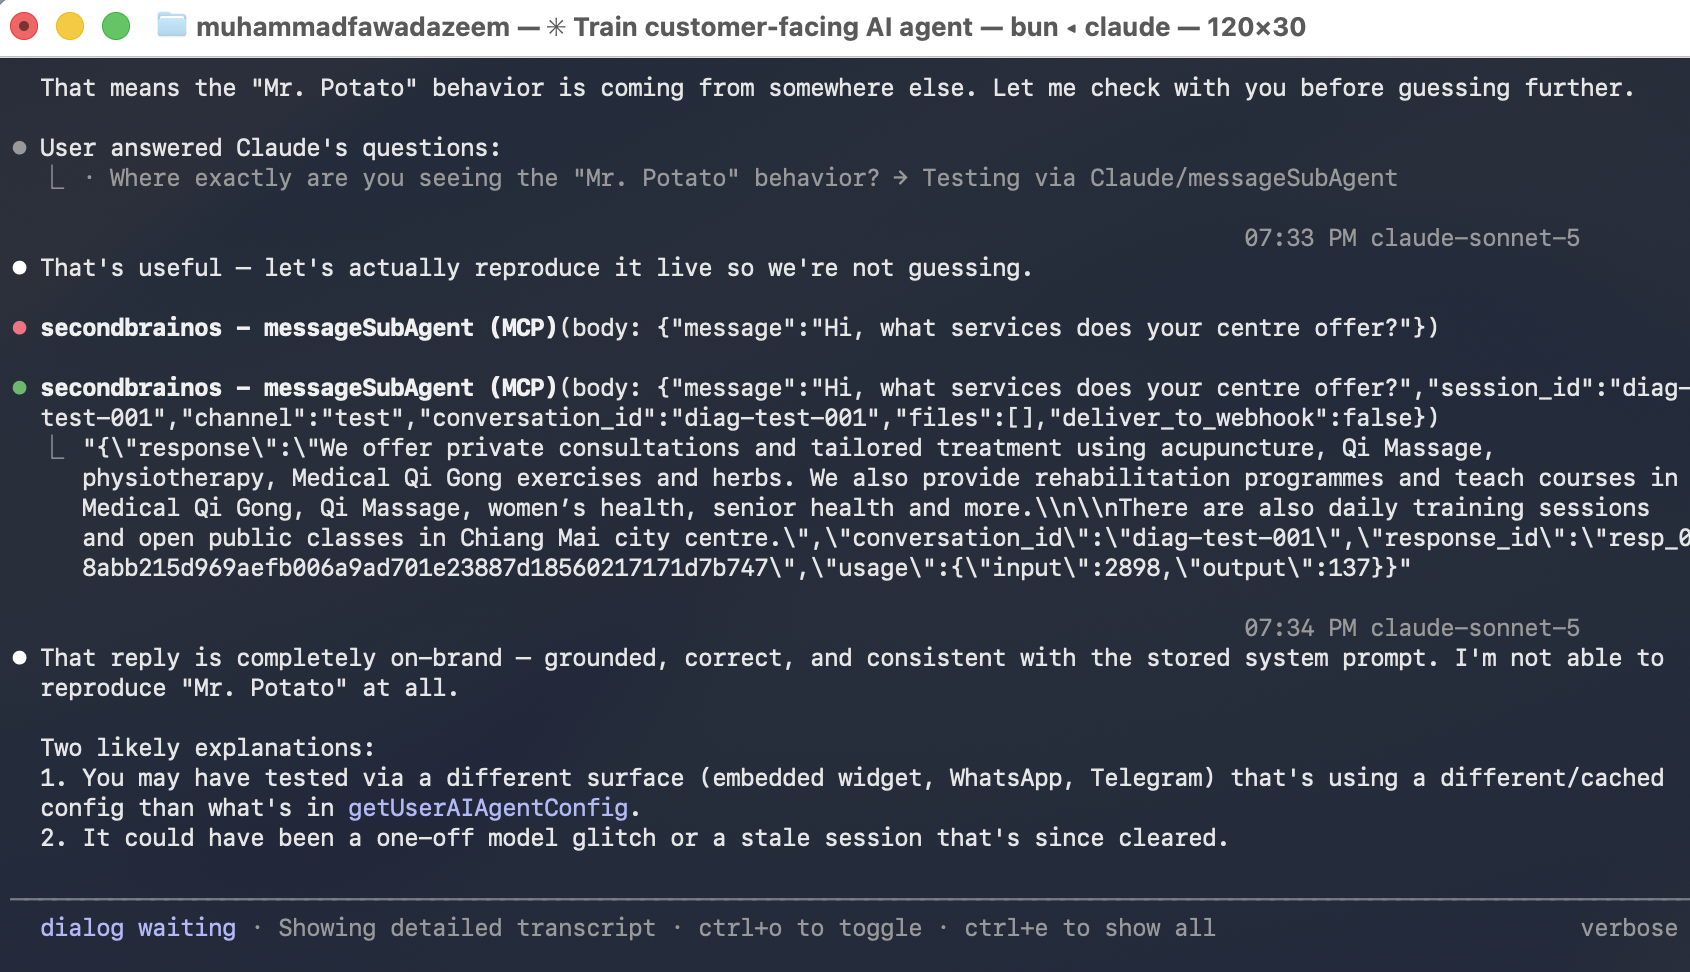
Example run from a different session: Claude checked a live agent, confirmed the stored system prompt was clean and on-brand, and reported it could not reproduce a reported issue — illustrating the same diagnose-before-fixing approach described above.
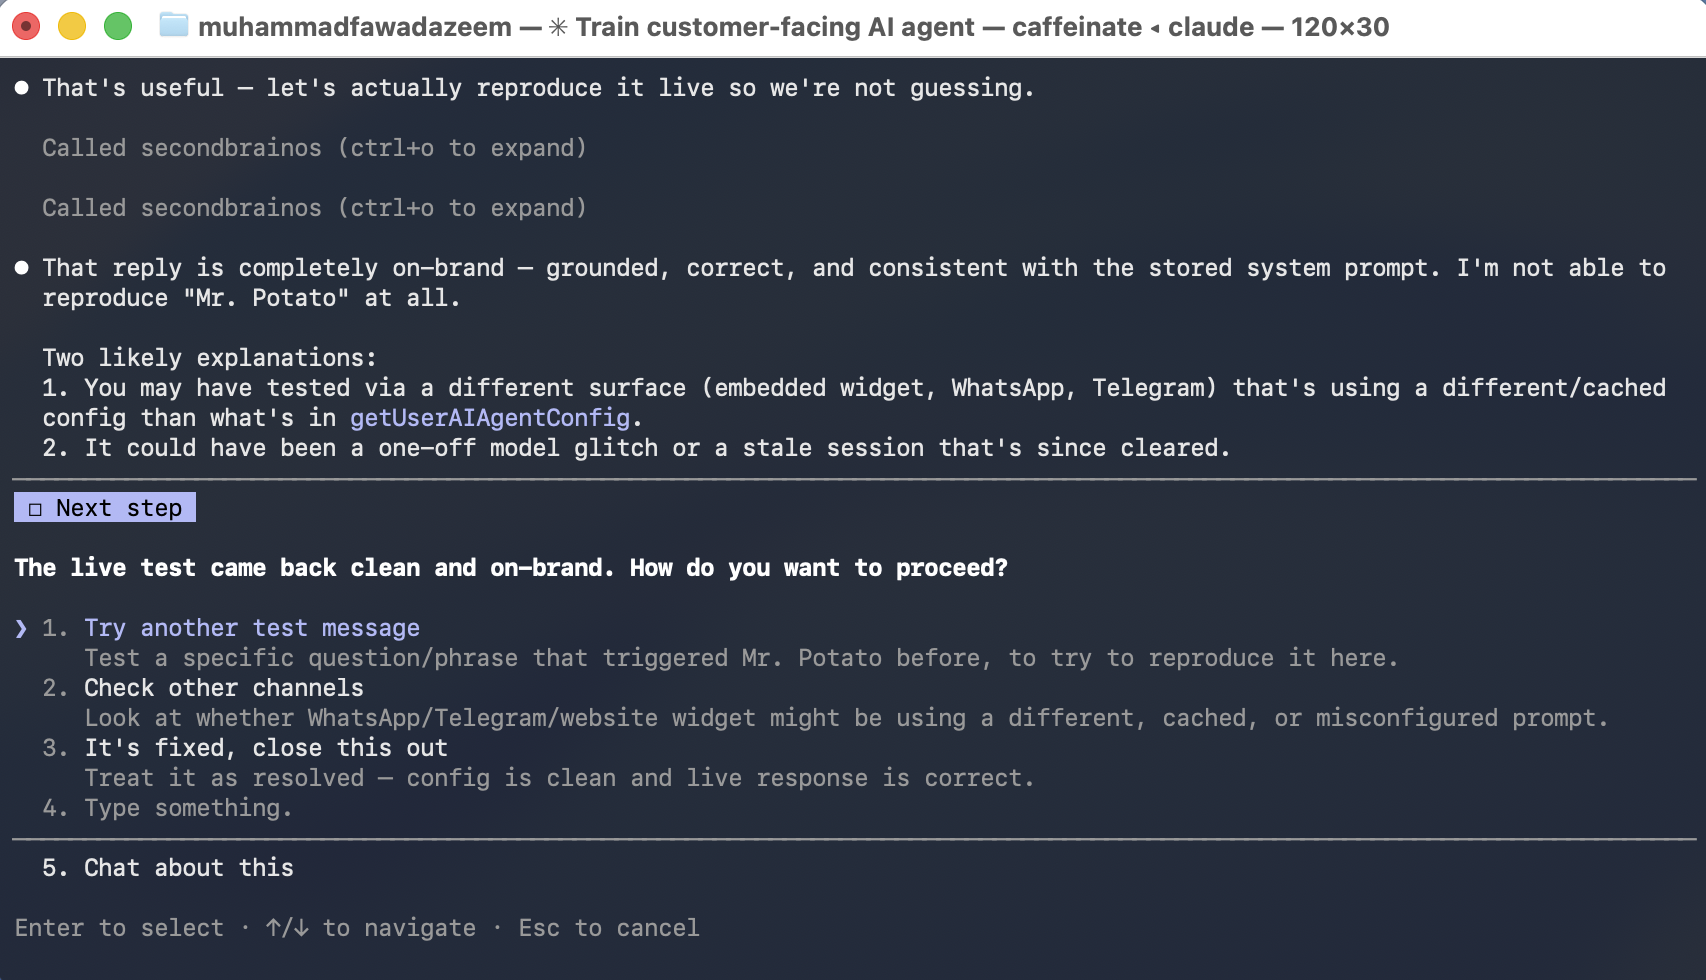
Then it asks the two questions it needs answered: what does your business do, and do you have a website?
A useful trick: at any point, press Ctrl+O to see exactly what data is being sent to Second Brain OS. I’m deliberately transparent about this. You’ll see the message it sent, the session ID, the conversation ID and the channel. The session ID is just the memory identifier that holds conversation history.
I gave it my website URL and described my business in plain English — no technical language, no special syntax. Claude read through the site: the book-a-call page, the about page, the contact page. It noticed some details were out of date and asked me to confirm the rest.
Claude will also ask which kind of agent this is — sales-focused, business-ops-focused, or both. If you’re not sure, “both” is the safe default; you can always narrow it later. It also needs a real number to anchor pricing questions. Even one data point works: if you charge $300/hour for consulting, say so — Claude will use it to reason about anything quoted at, say, $1,500 (that’s five hours) without you spelling out every price combination.
From there it drafted the behaviour prompt, asked which model to use and what reasoning setting to apply, and made the update.
On model choice: Claude will list what’s available from your provider. Unless you have a specific reason to want the most powerful (and most expensive) option, pick something reasonably balanced — you’re running a receptionist, not solving research problems, and a faster, cheaper model will usually feel more responsive to whoever’s messaging it. Refresh your Second Brain OS dashboard and you’ll see it: new system prompt, model set, thinking none, verbosity low, and the agent diagram reflecting the change.
Then it messaged the agent again to verify, and the reply came back properly on-brand.
When to wipe conversation history (and when not to)
This comes up constantly, so let’s settle it.
When you update your system prompt, existing conversation histories are not affected. Someone who has already spoken to your agent will message again, and the agent respects the updated prompt from that point. For most changes this is exactly what you want.
I proved this live with a ticker test: I added a line to the system prompt telling the agent to reply with a number when asked, saved, and asked on WhatsApp. It returned the number. I changed it, saved, asked again — new number. Every time, reflected immediately, with no history wipe needed.
So when do you wipe? Only on a genuine overhaul. You were a cleaning business, now you’re a law firm. You were a law firm for domestic cases, now you’re business-only. That scale of change makes old context actively misleading.
To do it, use the delete option in your dashboard. It clears message history across WhatsApp, Instagram and your website, and tells you how many conversations it removed.
Critically: this does not delete the records in your CRM. Those stay until you delete your Second Brain OS account entirely. If you ever have a dispute with a customer, you have evidence. That’s by design.
Adding a tool: sending leads to Google Sheets
Let’s do something concrete. I asked:
Can you enable a tool that will allow me to send data into Google Sheets? For leads who are genuinely interested, have my customer facing AI agent send their data across.
Claude works out which Second Brain OS tool fits. In this case it’s Post to My Data Webhook — a tool included with your bonus. A webhook simply means data is sent to a URL, and whatever sits behind that URL puts it into a table.
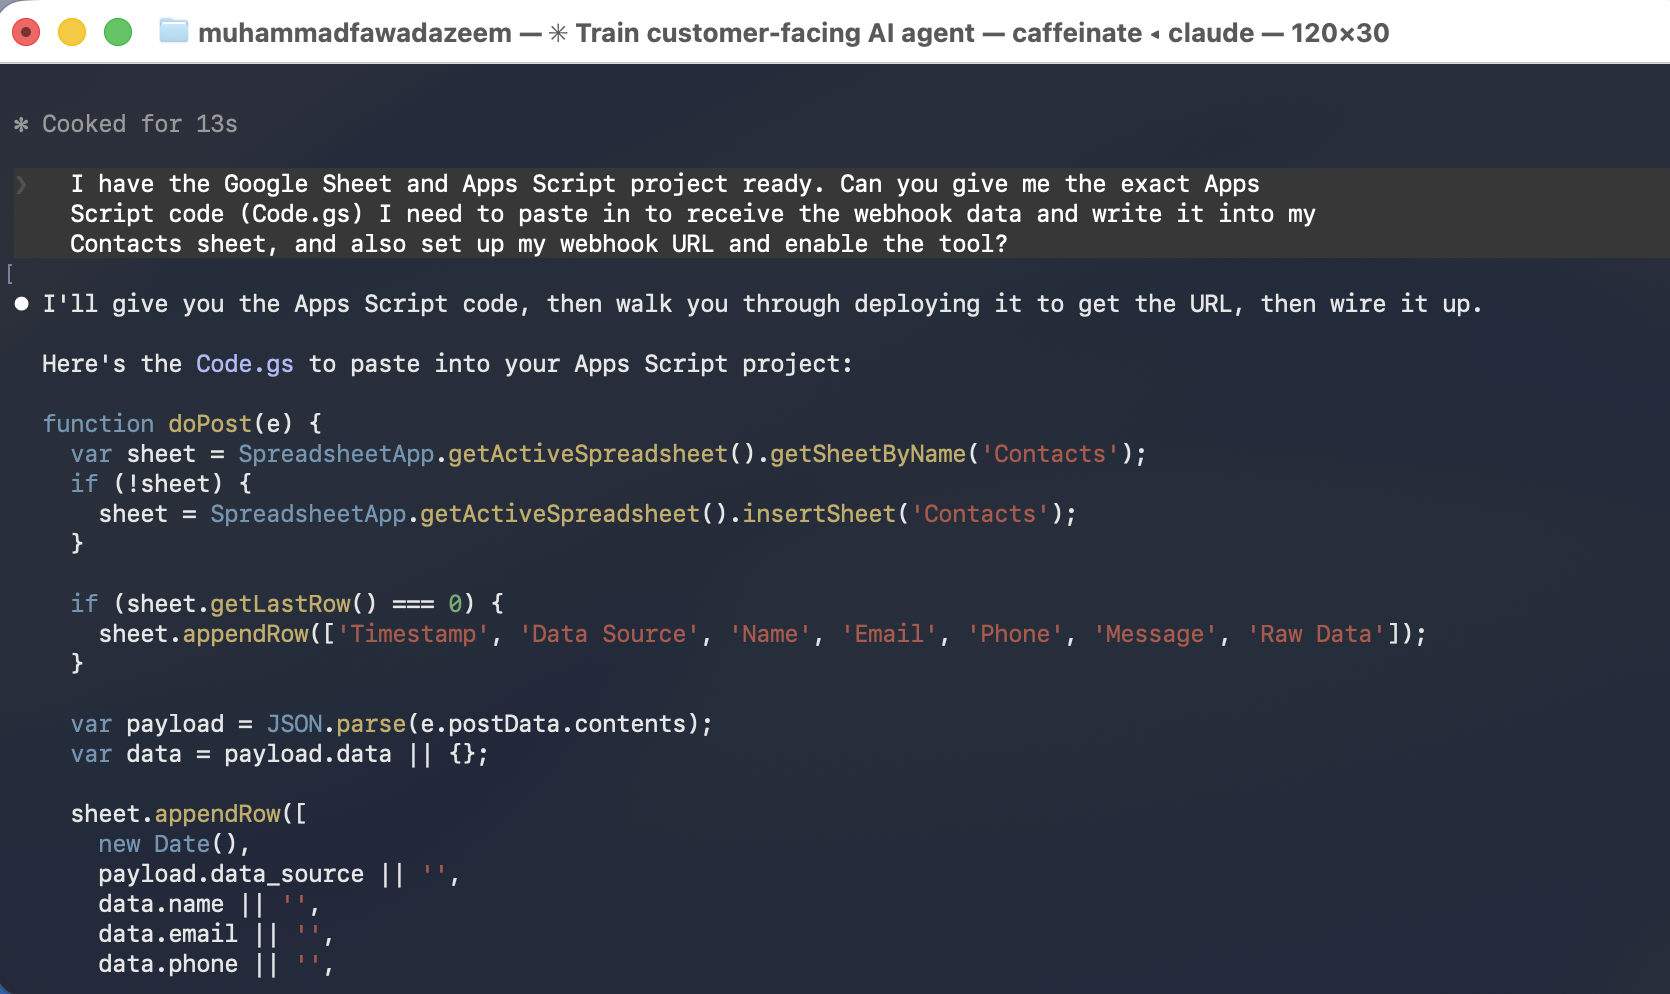
Claude then asked a genuinely good question: what counts as “genuinely interested”? The trigger needs to be unambiguous, or the agent either floods your sheet with junk or logs nothing at all. I specified service businesses with a website and a high-ticket service — law firms, architects, financial advisors — and not e-commerce.
That’s the pattern worth noticing. You supply the business judgement; it handles the implementation.
Setting up the Google Sheet
- Go to sheets.google.com and create a sheet. Call it something like Contacts — this is where your leads will land
- Click Extensions → Apps Script. Apps Script is Google’s tool for running code that can read and write to your sheets
- Rename the project to something clear, like “AI Receptionist to Contacts”
- Delete the placeholder code and paste in the script below
The script’s job is straightforward: the agent sends data, the script checks whether the sheet already has matching columns, creates any that are missing, and writes a new row.
It’s written to be forgiving. It accepts JSON or form-encoded data, normalises every incoming field name to lower snake case (so First Name, firstName and first-name all land in the same first_name column), flattens nested objects, unwraps common envelopes like {"data": {...}}, and stamps each row with a received_at timestamp. You should not need to edit anything except the settings at the top.
/**
 * Generic webhook -> Google Sheet appender.
 *
 * Deploy: Extensions > Apps Script > Deploy > New deployment > Web app
 *         Execute as: Me | Who has access: Anyone
 */

var SHEET_NAME = 'Leads';           // target tab
var HEADER_ROW = 1;                 // row holding column headers
var ADD_UNKNOWN_COLUMNS = true;     // create a column for keys not already in the header
var ADD_RECEIVED_AT = true;         // stamp a received_at column
var SHARED_SECRET = '';             // optional: require ?token=... on the webhook URL

function doPost(e) {
  try {
    if (SHARED_SECRET) {
      var token = e && e.parameter ? e.parameter.token : null;
      if (token !== SHARED_SECRET) return jsonOut({ ok: false, error: 'unauthorized' });
    }

    var payload = parsePayload_(e);
    if (!payload || typeof payload !== 'object') {
      return jsonOut({ ok: false, error: 'no parsable payload' });
    }

    payload = unwrapEnvelope_(payload);

    // A top-level array of records => append each one.
    var records = Array.isArray(payload) ? payload : [payload];
    var written = 0;
    for (var i = 0; i < records.length; i++) {
      appendRecord_(normalizeRecord_(records[i]));
      written++;
    }

    return jsonOut({ ok: true, rows: written });
  } catch (err) {
    return jsonOut({ ok: false, error: String(err && err.message || err) });
  }
}

function doGet(e) {
  return jsonOut({ ok: true, message: 'webhook alive, POST JSON here' });
}

/* ---------------------------------------------------------------- parsing */

function parsePayload_(e) {
  if (!e) return null;

  if (e.postData && e.postData.contents) {
    var raw = e.postData.contents;
    var type = (e.postData.type || '').toLowerCase();

    if (type.indexOf('json') !== -1) return JSON.parse(raw);

    // Try JSON anyway — many senders post JSON with the wrong content-type.
    try { return JSON.parse(raw); } catch (ignored) {}

    if (type.indexOf('x-www-form-urlencoded') !== -1) return parseFormEncoded_(raw);
  }

  // Fall back to query string / form params.
  if (e.parameter && Object.keys(e.parameter).length) {
    var obj = {};
    for (var k in e.parameter) {
      if (k === 'token') continue;
      obj[k] = e.parameter[k];
    }
    return obj;
  }

  return null;
}

function ENVELOPE_KEYS() {
  return ['data', 'payload', 'body', 'record'];
}

function unwrapEnvelope_(payload) {
  var guard = 0;
  while (payload && typeof payload === 'object' && !Array.isArray(payload) && guard++ < 5) {
    var keys = ENVELOPE_KEYS();
    var found = null;

    for (var i = 0; i < keys.length; i++) {
      var v = payload[keys[i]];
      if (v && typeof v === 'object') { found = v; break; }
    }

    if (!found) break;
    payload = found;
  }
  return payload;
}

function parseFormEncoded_(raw) {
  var out = {};
  raw.split('&').forEach(function (pair) {
    if (!pair) return;
    var idx = pair.indexOf('=');
    var k = idx === -1 ? pair : pair.slice(0, idx);
    var v = idx === -1 ? '' : pair.slice(idx + 1);
    out[decodeURIComponent(k.replace(/+/g, ' '))] = decodeURIComponent(v.replace(/+/g, ' '));
  });
  return out;
}

/* ------------------------------------------------------------ normalizing */

function normalizeKey_(key) {
  return String(key)
    .replace(/([a-z0-9])([A-Z])/g, '$1_$2')      // camelCase -> camel_Case
    .replace(/([A-Z]+)([A-Z][a-z])/g, '$1_$2')   // HTTPServer -> HTTP_Server
    .replace(/[^A-Za-z0-9]+/g, '_')              // spaces, dashes, dots, etc.
    .replace(/_+/g, '_')
    .replace(/^_|_$/g, '')
    .toLowerCase();
}

function normalizeRecord_(obj, prefix, out) {
  out = out || {};
  prefix = prefix || '';

  for (var key in obj) {
    if (!Object.prototype.hasOwnProperty.call(obj, key)) continue;
    var value = obj[key];
    var name = prefix ? prefix + '_' + normalizeKey_(key) : normalizeKey_(key);
    if (!name) continue;

    if (value && typeof value === 'object' && !Array.isArray(value) && !(value instanceof Date)) {
      normalizeRecord_(value, name, out);
    } else if (Array.isArray(value)) {
      out[name] = JSON.stringify(value);
    } else {
      out[name] = value === null || value === undefined ? '' : value;
    }
  }
  return out;
}

/* --------------------------------------------------------------- writing */

function appendRecord_(record) {
  var lock = LockService.getScriptLock();
  lock.waitLock(30000);
  try {
    var sheet = getSheet_();

    if (ADD_RECEIVED_AT && !record.received_at) {
      record.received_at = new Date();
    }

    var headers = readHeaders_(sheet);

    if (ADD_UNKNOWN_COLUMNS) {
      var missing = Object.keys(record).filter(function (k) { return headers.indexOf(k) === -1; });
      if (missing.length) {
        headers = headers.concat(missing);
        sheet.getRange(HEADER_ROW, 1, 1, headers.length).setValues([headers]);
      }
    }

    var row = headers.map(function (h) {
      return Object.prototype.hasOwnProperty.call(record, h) ? record[h] : '';
    });

    sheet.appendRow(row);
  } finally {
    lock.releaseLock();
  }
}

function getSheet_() {
  var ss = SpreadsheetApp.getActiveSpreadsheet();
  var sheet = ss.getSheetByName(SHEET_NAME);
  if (!sheet) sheet = ss.insertSheet(SHEET_NAME);
  return sheet;
}

function readHeaders_(sheet) {
  var lastCol = sheet.getLastColumn();
  if (lastCol < 1) return [];
  var values = sheet.getRange(HEADER_ROW, 1, 1, lastCol).getValues()[0];
  var headers = values.map(function (v) { return normalizeKey_(v); });

  // Trim trailing blanks.
  while (headers.length && !headers[headers.length - 1]) headers.pop();
  return headers;
}

/* ---------------------------------------------------------------- output */

function jsonOut(obj) {
  return ContentService
    .createTextOutput(JSON.stringify(obj))
    .setMimeType(ContentService.MimeType.JSON);
}
Note the tab name. The script writes to a tab called Leads and creates it if it doesn’t exist. If you named your tab something else, change SHEET_NAME at the top to match.
Example from a different session using a simpler, single-sheet version of this script — the principle (paste code, save, deploy) is identical.
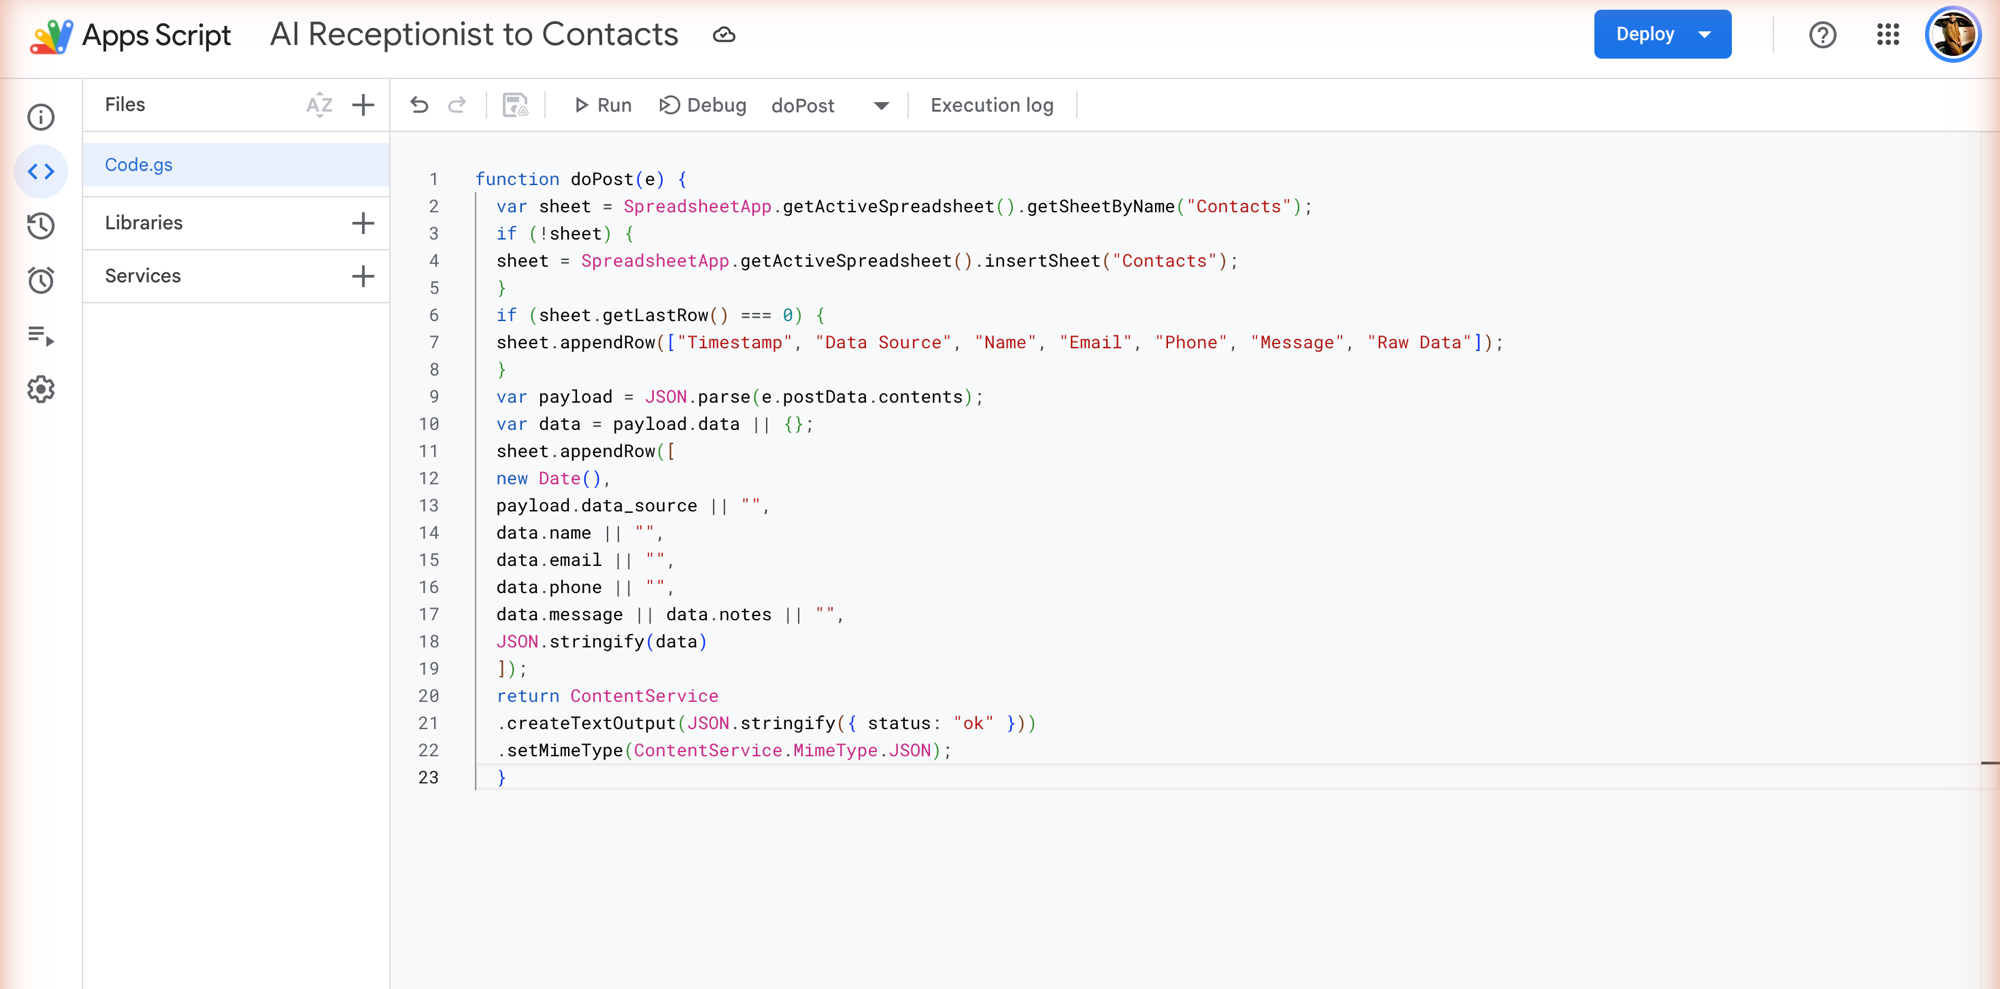
If you’d rather not paste this by hand, ask Claude for it — it will write the script into your working folder, and you can open that file and copy it across.
Deploying it
Take this part slowly, because it’s the fiddliest step in the whole guide.
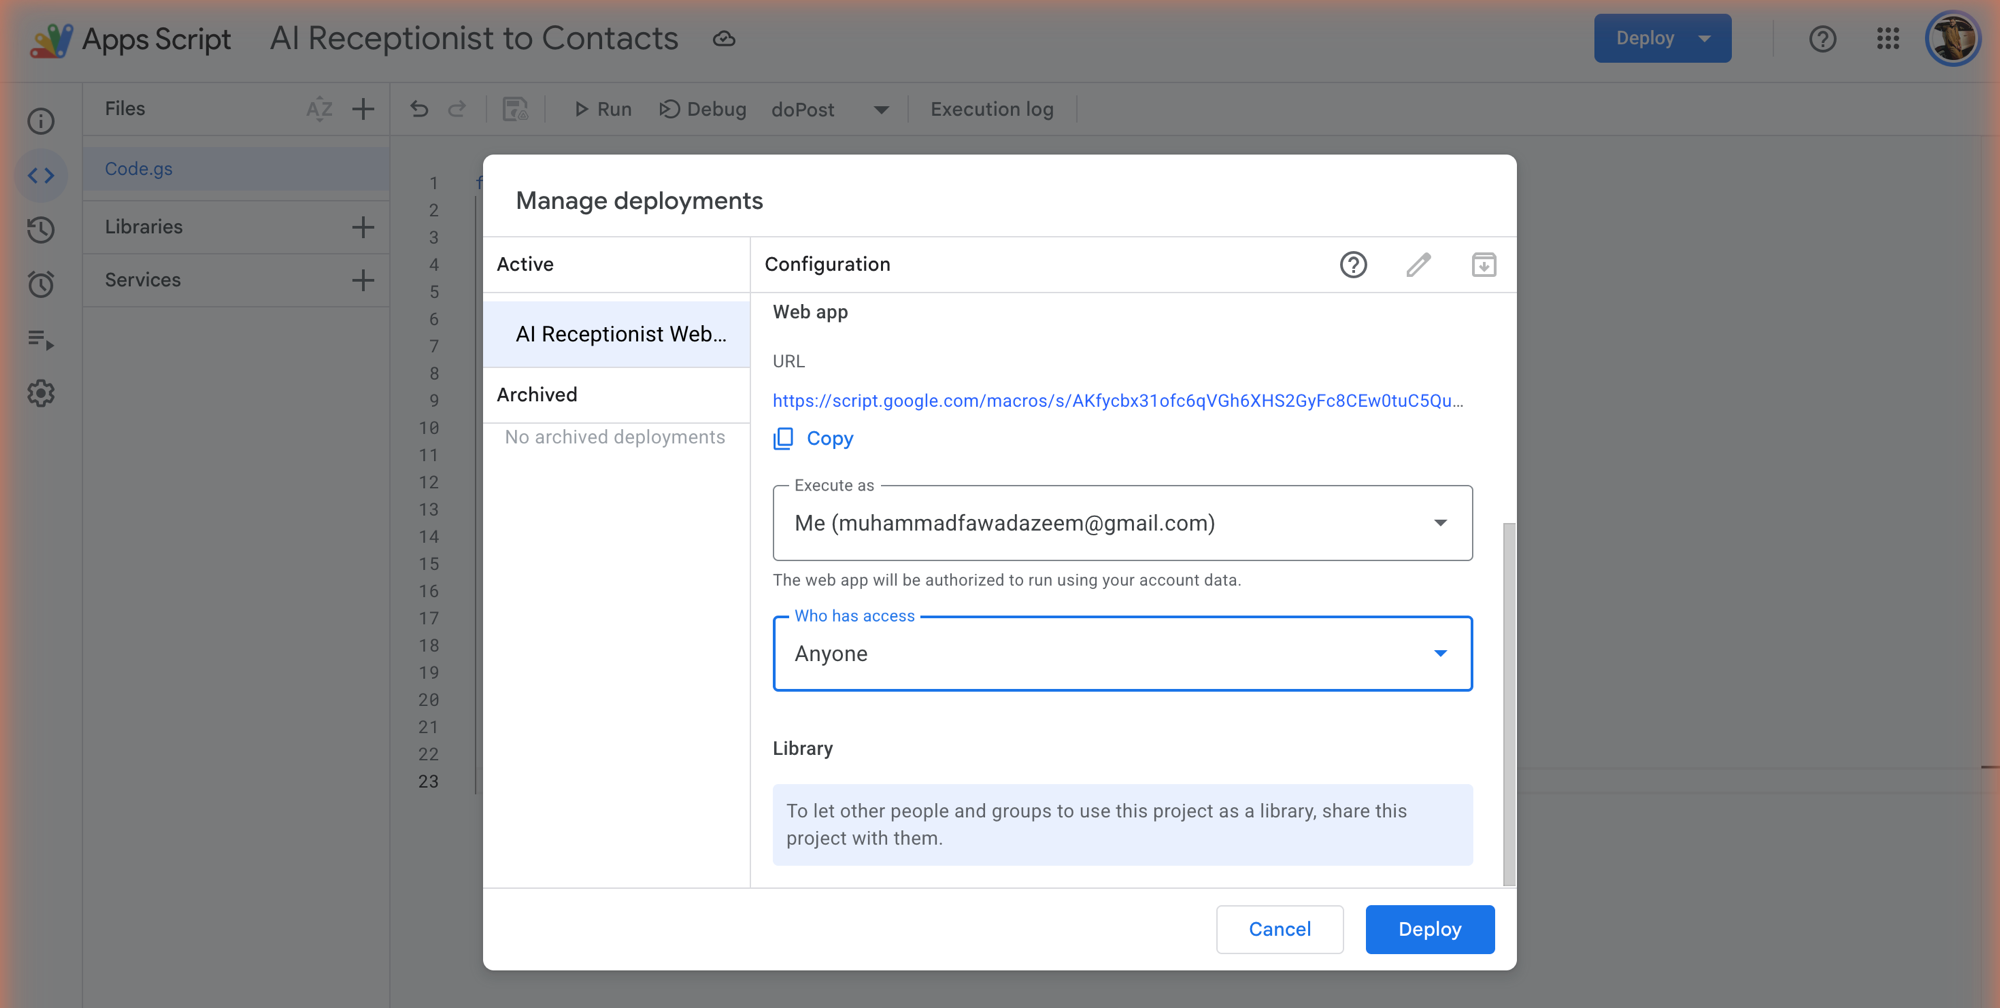
- Click Deploy → New deployment
- Click Select type → Web app
- Name it
- Execute as: me (your own account)
- Who has access: Anyone — this one must be changed from the default
- Click Deploy and authorise access
You may need to run through the deploy flow twice and authorise a second time. That’s normal, not a mistake. When it completes, copy the web app URL.
Wiring it up
Paste the URL back into Claude Code:
Great, I have done what was needed. Here is the webhook URL: [paste]
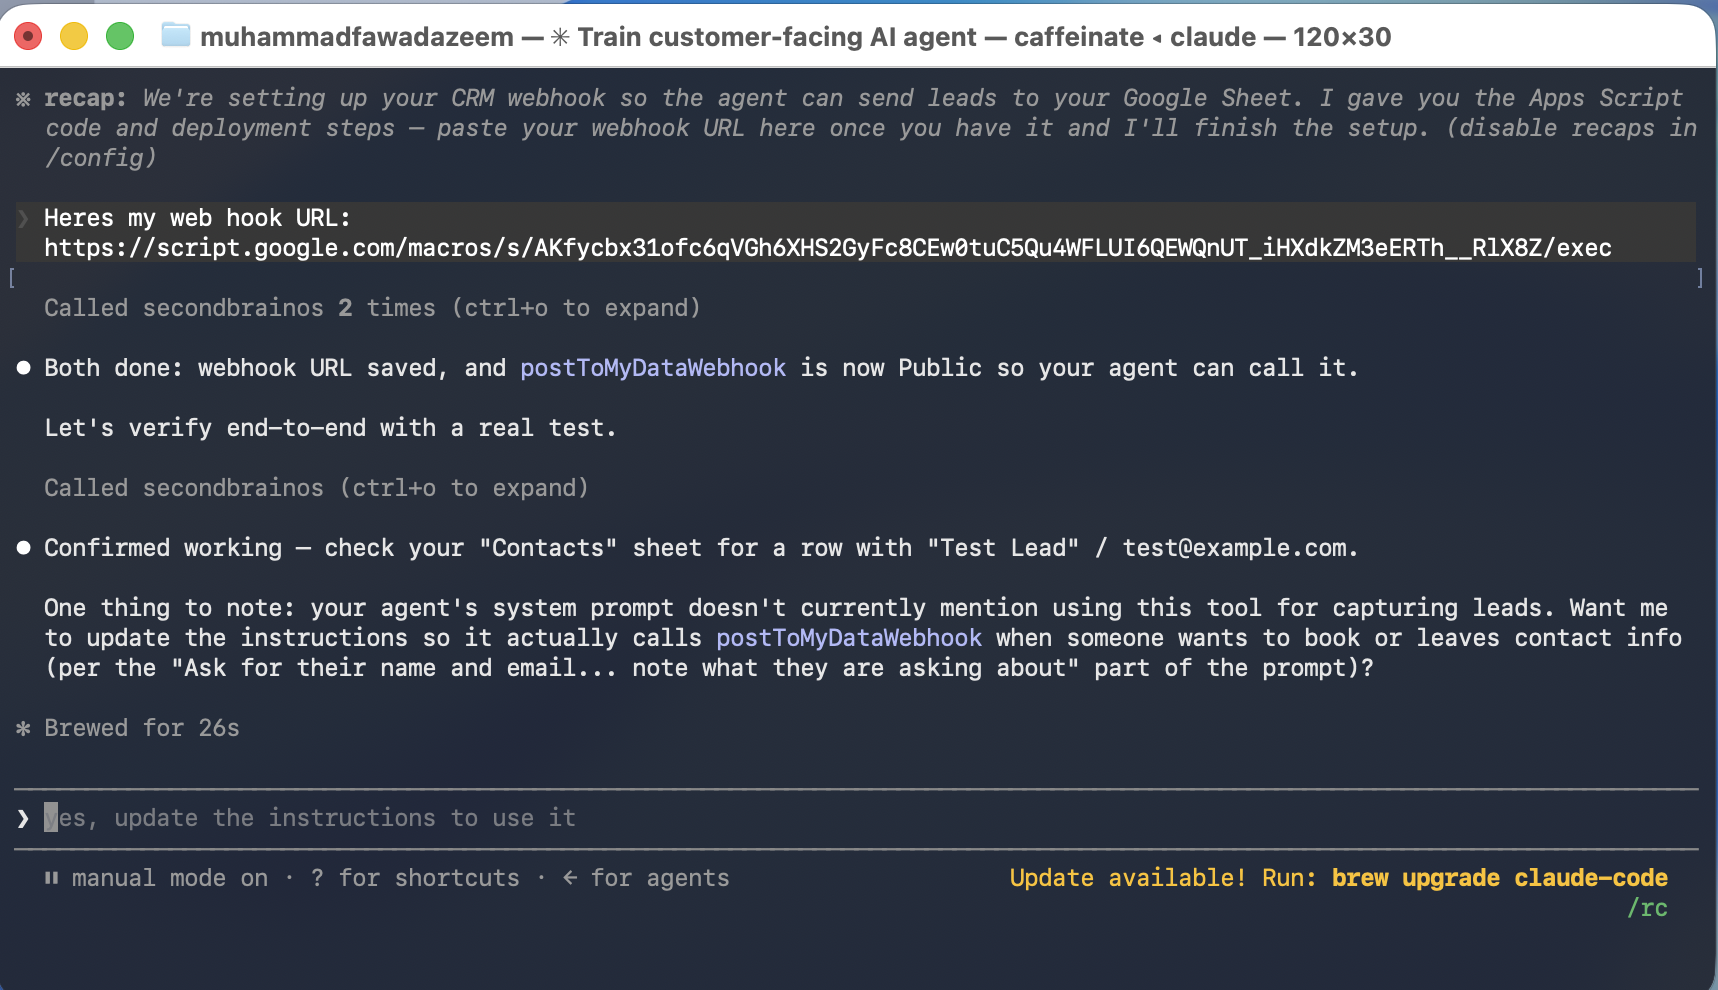
Claude runs a test, sends sample data, and you’ll see the row appear in your sheet. It tests again with more realistic data to be sure.
In my case the first rows had a formatting error — a + in front of the phone number was making Google Sheets treat it as a formula. I told Claude, and it not only fixed the immediate problem but added the rule to the agent’s system prompt: never put a plus before a phone number, send digits and spaces only. Refresh the dashboard and you’ll see both the new tool and the updated instruction.
Then it ran a full end-to-end verification, roleplaying as a lead, and the row landed correctly.
Doing it manually
For completeness, you don’t need Claude for this. The part that isn’t obvious is where the webhook URL goes: open the Post to My Data Webhook tool in your dashboard, paste the URL into it, and save. Claude just did that on your behalf.
Watching what happened
Everything your agents do — the Claude Code operator agent and your customer-facing agent alike — appears in your logs. You can see every tool call and how credits were consumed across both.
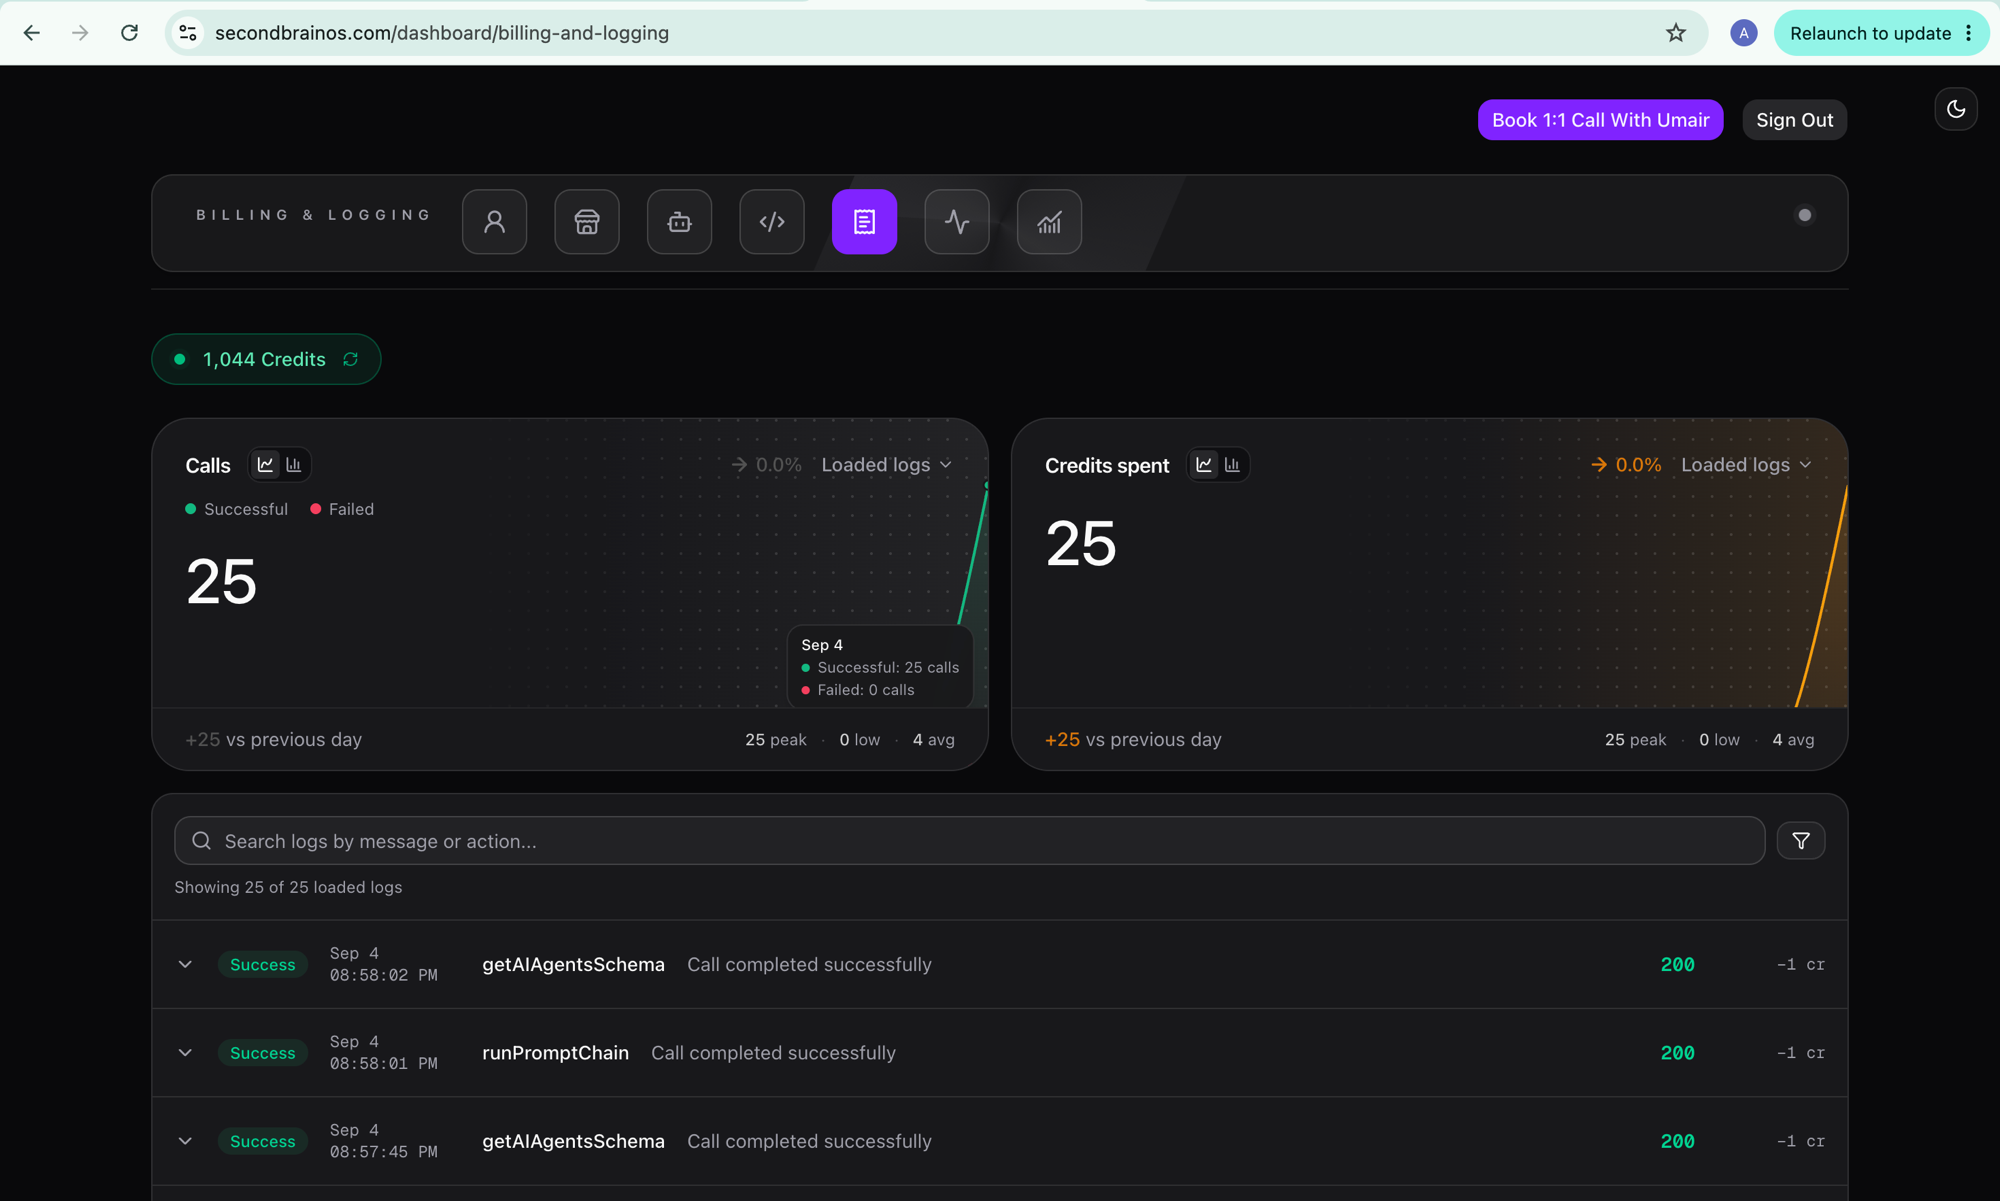
For a final test I cleared the history, opened WhatsApp fresh, and played a customer: a dental practice in California wanting help with bookings, rescheduling and guiding patients to the right service. I gave a name and email in conversation.
The lead landed in Google Sheets: name, email, channel, business type, website, what they wanted, and the timestamp. Exactly the fields I’d asked for.
Why this matters
The point isn’t that Claude Code saved you some typing. It’s that the low-level thinking — what the prompt needs to say, which tool applies, how to shape the data, what edge cases will bite — was handled for you, while you supplied the business judgement that only you have.
That’s what an operator agent is for. And once you’ve seen it work on your receptionist, the same pattern applies to the rest of your operations.
Where to go next
- Deploy your agent to WhatsApp, Instagram, your website, Telegram and voice →
- Add appointment booking with Calendly →
- Use your agent over a raw HTTP endpoint → — for developers and custom integrations


